Building your email list, part 2

Standard

This is the second part of a longer blog post: part 1 is here.

People who sign up to your email list need nurturing, and at the same time you need to work at signing up new readers.

You’ll always be losing subscribers through unsubs, changed email addresses, spam filters and just being invisible – whether it’s because you don’t send often enough to the list, or your emails are disappearing into spam or ‘promotions’ folders. Then again, those subscribers who are still opening and responding to your emails after many months or years are your most loyal and valuable.

It’s important to create valuable content for your newsletters so that people look forward to your email updates. But as well as this, what else can you do to help keep your list growing?

1) Encourage shares & forwards whenever you send an email – top and tail with ‘forward to a friend’ messages and include social sharing buttons.

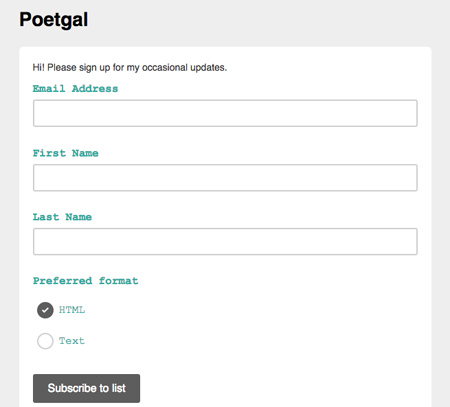
2) Capture visitors by making your sign up box stand out. For example – with the SumoMe WordPress plugin you can set a floating sign up message & box to appear, and customise it to first visits only if you don’t want it to be too annoying.

Sumome WordPress plugin

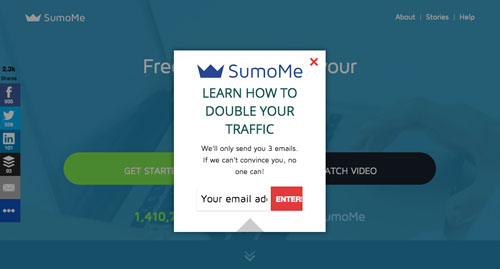
Example of a floating email sign up box on SumoMe’s homepage


3) Offer an incentive to join your list – for example a sample chapter, a free tip sheet or entry into a giveaway. There is a caveat here: some people will join a list just to get the freebie, then unsubscribe.  Just saying!

4) Offer a short course or series by email – delivered by timed autoresponders. You can do this if you use a service such as Aweber, or the paid version of Mailchimp. The thinking behind this is that repeated exposure in the few days after signing up not only reminds readers of who you are and what you offer, but takes advantage of the ‘honeymoon’ period when people can still remember why they signed up for your emails and how great you are. For example, you could offer a short story, delivered by seven installments by email.

5) Turn your email list into a community in itself – perhaps give email subscribers access to a private group on Facebook, or let them have exclusives on cover reveals, earlybird invitations to your book-related events or readings and other ‘thankyous’ to let them know you appreciate them. Loyal email subscribers are likely to be your best advocates, talking up your work on social media and face to face with others, so they are worth looking after.

6) When you send out a newsletter or email exclusive, let it slip on your blog and in your social updates. It doesn’t have to be as direct as ‘My newsletter is going out today, sign up now or miss out’ – which can come across as hectoring – but mention the actual content – if it sounds intriguing, if there’s something ‘in it for them’ and if you make it easy to sign up, you should see some takeup.

7) Collect email addresses offline, from people who come to your readings or other events. Have a sign up list on the table where you are signing books, or a simple QR code that people can scan to join your list. (More about how to set up a QR code in another post!)

8) Promote a book giveaway, and have entrants submit with their email address. You can create a simple giveaway for free at Rafflecopter, for example.

Rafflecopter

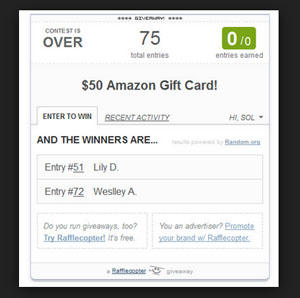
Rafflecopter allows you to create and administer giveaways, even randomly selecting the winner(s) for you.

9) Get together with another writer or blogging buddy and offer a joint giveaway or contest – that way you both reach a new audience and potential new sign ups. (You must ask permission to add people’s email addresses to your list, don’t just add them automatically.)

10) When creating content for guest blogging opportunities, include a call-to-action and link for readers to subscribe to your email updates in your author byline. (I need to be better at this!)

There are no doubt many other ways of growing your list. Best results come from a multi-pronged approach! When you’re browsing other people’s blogs and websites, notice how they do it. Let me know in the comments if you’ve tried these or other methods and how they work for you.

Building your email list, part 1

Standard

A few years ago marketers, were all speculating on the future of email. With the rise in popularity of social media, and the seemingly hopeless issue of how to control spam, email looked like it might go the same way as the printed phone directory or the audio cassette.

But email is as popular as ever as a marketing tool.

Why you should build an email list

When someone opts in to receive email updates, they have given their permission to be marketed to and are a pre-sold audience. Direct response rates for permission marketing are higher than just about any other kind. The sender can communicate on an individual level with people, and can control the timing and frequency of the message.

By way of contrast, if you want to use social networks for marketing purposes you can only really do so with paid advertising. This is not permission marketing in the sense of it being shown only to people who have asked to see it, it is interruption marketing, or the old-style 20th century tactics which most of us endure (for the sake of ‘free’ services) rather than invite.

There’s nothing inherently wrong with trying some interruption marketing – Facebook ads, for example, can be very effective in certain circumstances. But permission marketing, in the form of an opt-in email newsletter, needn’t cost anything except your time to set up, and the payback long term is that you build a bona fide list of fans. And one of the best things about an email list is that it’s portable – Facebook may disappear overnight, your website may go down, but your email list is yours to keep.

How to create a sign-up form

To start building your email list you need to set up a few things:

1) You need an account with an email marketing service. There are plenty to choose from, but a good free service that integrates easily with various platforms is Mailchimp, so in this article I’ll use that as an example. (The principles explained here are relevant whatever email platform you choose.)

2) Decide what you’re going to be sending out, and how often – this needs to go on your sign-up form. A regular newsletter is a commitment, so manage people’s expectations and don’t over-promise. ‘Occasional updates’ is fine if you don’t want to be tied to a set publication schedule, but it’s not as compelling as ‘A weekly firehose of essential information and writerly tips’ or whatever. As marketers always say, ‘sell the benefits’. You can always tweak this.

3) (Desirable but not essential) – you need a platform from which to sign people up – for example your blog or website, and/or a Facebook Page.

Once you’ve got this far, the next step is to create a list in Mailchimp, Constant Contact, AWeber or whichever service you have signed up for, and a sign-up form for that list. Here’s how to do it in Mailchimp:

From your Mailchimp dashboard select ‘Lists’ from the menu and ‘Create List’. (You can create multiply lists and groups within lists.)

Mailchimp - add list 1

Creating and saving a list is fairly straightforward. Mailchimp ‘Support’ files are very good if you get stuck.

When you have a list, it will show up under ‘Lists’ together with any others you create. To add a sign-up form, click on the down arrow next to the list name and select ‘Sign-up forms’:

Mailchimp lists 2

Here’s where it can get a bit complicated. There are different form types to choose from.

For now, choose ‘General Forms’ and you’ll be guided through setting up your basic form – adding or deleting fields, adding some introductory text, plus some basic customising of colours.

mailchimp general form

Once you’ve finished customising, you’ll see there’s a link to your form – ‘Sign-up Form URL’. If you don’t have a website, blog or anywhere else where you want to put the form, you can link here, from anywhere you like. This is the kind of thing people will see:

mailchimp hosted form

However, if you want the sign-up form in a widget on the sidebar or your blog, or on your Facebook page, or if you have a hosted blog (on Blogger or WordPress.com for example), you need to do a bit more work. Here’s where I hand you over to the excellent Mailchimp support articles:

How to add a sign up form to your website (‘Embedded form’)

How to add a sign-up form to a Blogger site

How to add a sign-up form to your self-hosted WordPress blog (not WordPress.com sites)

How to add a sign-up form to a Facebook Page

If you have a WordPress.com hosted blog, like mine at Poetgal, you won’t be able to embed your sign-up form in a widget, but there are ways to work around it. I actually have a sign-up form for my ‘Social Media Essentials’ email newsletter which is embedded in the side bar of this site (because it’s on a self-hosted WordPress platform), but I can’t embed it at Poetgal. So I just have a link to the hosted version of the ‘general’ form, which comes up in a new window when you click on the link:

Sign up form Poetgal

Having a sign-up form on your blog, or linking to a hosted version, is only really the first step in building your list. “If you build it they will come…”? Hmmm….not necessarily! In part 2 we’ll be looking at strategies to build your email subscriber list and examples of how to do it successfully.