How to promote your blog posts on social media – manual vs automation methods

Standard

You’ve written a new blog post and hit ‘publish’.

What next? You may have subscribers who receive an email alert, either immediately or maybe in a weekly digest, together with other blogs they follow.

But what about reaching new readers? Your post may well come up in searches – particularly if you’ve thought about your keywords and used them strategically.

Blogs are part of the bigger social web, and the principal way they get found (and you get new readers) is via the sharing that happens on online social networks – not just directly from your blog, or on Twitter, Facebook, Google+ and so forth but also blogger communities, writers’ communities and special interest forums. But for sharing to take place, people have to know about your blog posts.

What can you do to help kickstart the sharing process? The answer is as much or as little as you like.

The manual method

How it works: You log onto your social network(s), write an update and post in the URL to your blog post. Some people see it, click on it and hopefully share it to their networks.

Upsides: doing it manually means you can write bespoke updates for each of your social networks, which may be desirable if you connect with different audiences and want to customise your language, or maybe not always post to a particular network. You will have a clear picture of what updates are being posted when and where, so you feel in control and happy that your audience won’t feel swamped with too much promo.

Downsides: it’s labour-intensive, especially if you post often and are active on a number of networks or forums. Unless you consistently use a URL shortener/tracker like bit.ly, you won’t be able to easily track who’s clicking or sharing. When it comes to Twitter, one update probably won’t do it, because it’s unlikely all your followers will be online and monitoring their feed at that one moment.

The basic automation method

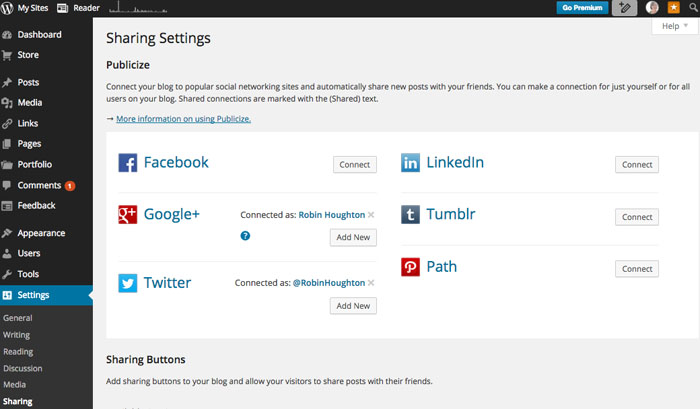
If you blog with WordPress, it’s fairly easy to connect your blog with your social networks so that whenever you publish a new post, an alert goes out. From your Dashboard, go to ‘Settings’- ‘Sharing’. Here’s the page for my blog Poetgal, and you can see I have connected it to my Twitter and Google+ accounts.

Sharing settings on WordPress

Once you’ve done this, when you’re on the Edit Post page you’ll see your Publicise settings on the right of the screen:

Publicise on WP screenshot

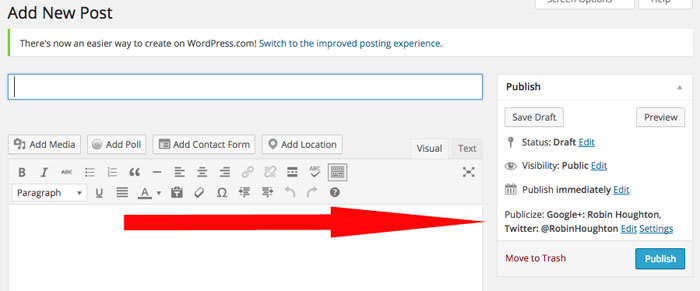
If you click on ‘Edit’ you can customise the wording of the auto-update. Then when you hit ‘Publish’ the update and link to your blog post will be posted to your connected networks. There’s a good walk-through of Publicize here.

If you’re not using WordPress, don’t worry, there are third-party apps that do the same job no matter what blog platform you’re using, and some come with many more features (see below for the all-singing all-dancing options). For example, take a look at Twitterfeed or IFTTT (which stands for ‘If This Then That’).

Twitterfeed IFTTT


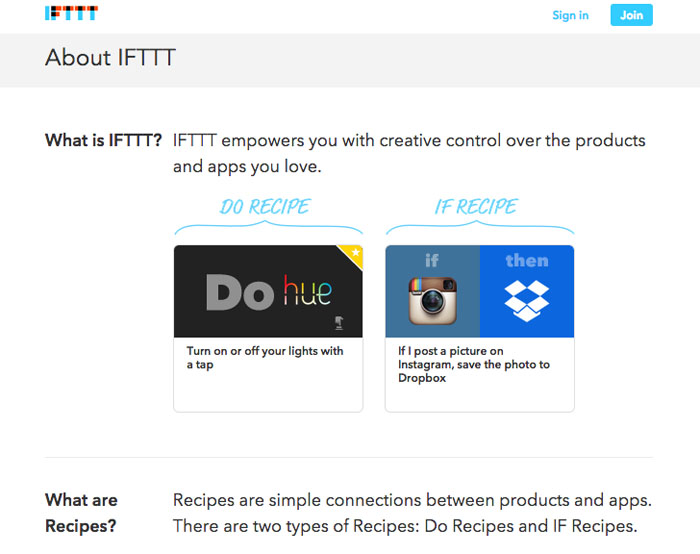
Upsides: You no longer have to go to your social networks and post each blog update, so it saves you a shedload of time, and having to think about it. Once these services are set up, they run in the background. An app such as IFTTT allows for quite specific targeting, using what it calls ‘recipes’. This means you can specify things like “If I publish a new post on my WP blog with the category ‘Twitter’ then post a tweet with image to @robinhoughton”. You can also set up automatic actions based on just about any activity on most social platforms.

Downsides: You may not want every update to go out on all your social networks, and if that’s the case you need to set up filters – always check what settings are available. These tools are pretty cool but there are so many of them it can feel overwhelming – it’s very easy to sign up for them as the basic versions are all free, but you need to keep a clear picture of what you’ve set up, otherwise you could end up multiple-posting. I’d advise finding a service you like and sticking with that. If you change any of your network passwords you’ll need to refresh the connections with any third party apps as they will stop running.

One of the main issues with basic, one-off auto posting is that it only happens once. So you have the same problem as manual posting in that not everyone will see your autopost. If this concerns you then you probably should choose an app that autoposts as many times as you like, at different times of day, what I would call managed automation.

The managed automation method

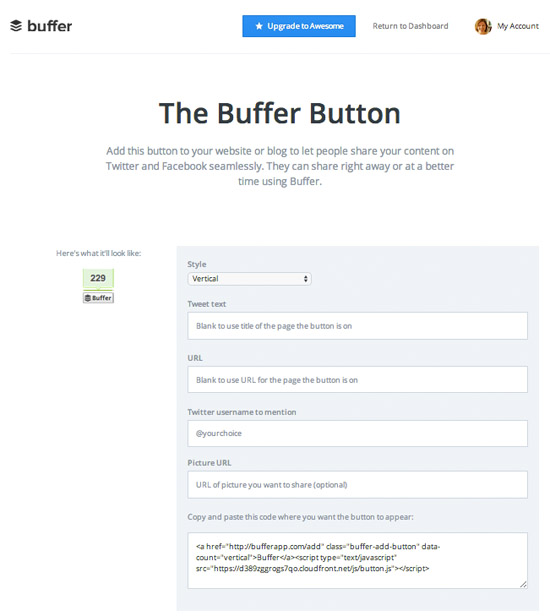
A step further from basic automation is to signup for a service that will allow you to manage a range of triggered actions based on your specifications. You can decide exactly what gets posted, where and when, and you usually have access to a whole range of other features such as browser extension allowing you to bookmark and share anything on the web, syndication of your blog posts to social bookmarking and media sites, and social analytics.

The good news is you don’t have to jump into using all the available features, and in fact the advanced features are usually only part of the premium (paid for) packages. Even so, the free versions of Hootsuite, Buffer and dlvr.it, for example, are all very good and worth checking out.

You can sign up with any of these services using your favourite social network (if you wish) or by creating a new username for that app. The free versions will have limits on how many social networks you can connect, access to analytics and custom features. But unless you are a pro blogger (running your blog as a business) then you’ll probably find the free services are plenty good enough. All these apps allow you to ‘queue’ your updates for re-posting across your networks at different times of day and on different days, in order to be seen by a bigger cross-section of your followers.

Upsides: These apps give more power to your social updates and take a lot of the elbow-grease out of it. Pro-bloggers swear by automation and there’s no doubt that if you are serious about making blogging pay, you need to spend less time doing things that can be automated, and more time on the stuff that requires brain-effort such as writing great blogs posts, interpreting your stats and nurturing strategic relationships.

Downsides: There will be some trial and error before you find the app(s) that suit you, and you need to pay attention to the setup. Automation isn’t for everyone: many people prefer slow-blogging: creating contacts more organically and growing a following based on recommendation and more personal promotional methods. That’s absolutely fine and if I’m honest I’m a bit of a slow-blogger myself. Having said that I do find Hootsuite invaluable as it gives me the right amount of automation and control while still keeping it real.

There’s a great deal of commercial clutter and over-promotion on the social web, and bombarding it with yet more isn’t on everyone’s agenda. However, you do want people to see your blog posts, and saving some of your precious time by taking advantage of the helpful tools available is, I think, a sensible choice.

Blog roundup: Live Write Thrive, Buffer & The Poetry Shed

Standard

One of the joys of blogging is reading other people’s blogs, and this week I thought I’d do a short blog roundup and share some things I’ve been reading lately, on blogs which you might like to add to your blog roll.

C S Lakin's blog Live Write Thrive

C S Lakin’s blog Live Write Thrive

First up is a blog post on author C. S. Lakin’s blog Live, Write Thrive. If you don’t subscribe to Susanne’s blog already I recommend it. This is actually a guest post by Dana Sitar: Crowdsourcing your self-publishing project without asking for money. My own view is that crowdsourcing is only going to grow in popularity as public funds for the arts dries up.

And incidentally, crowdsourcing may be a trendy name for it but it’s been around for centuries. Composers such as Handel and Purcell published a lot of their work by public subscription – that is, asking people to pledge they would buy a copy of their work before it had been written. In Victorian times in the UK it was common for public buildings and works to be financed by subscription – of course that was in the days of philanthropy and before all the tax-funded public services we now have. I believe the idea of philanthropy is still alive in the US though.

The Buffer blog

The Buffer blog

Over on the Buffer blog, this is interesting – How and why to write persuasive, research-backed content. A small experiment resulted in 40% more click-throughs to a blog when the headline mentioned a statistic. The piece goes on to give other examples and suggests how to make your blog posts stronger by backing up what you say with stories and statistics – as long they’re genuine stats, of course. Although I’m from the ‘statistics can be used to tell any story you want’ school of thought (it’s the marketer in me!) Again, the Buffer blog is one worth subscribing to for web marketing news and ideas. Plus they’re very nice people, which goes a long way in my book.

Abegail Morley's The Poetry Shed

Abegail Morley’s The Poetry Shed

Poet Abegail Morley blogs at the Poetry Shed (and yes, there really is a shed, I’ve seen it!) and although this post isn’t brand new, it’s a bit of a keeper – Helen Ivory talking about online poetry courses. Abegail’s blog is a mix of news, interviews and observations on the poetry world and is a good example of how to sustain interest and variety for her readers. Worth following.


Why images matter in blog posts

Standard

Should you, as a writer, be concerned about using images in your blog posts? It’s a fair question. Maybe not every post needs an image – it can be worse to shoe-horn in an image just for the sake of it, than to have no image. But there are several reasons why pictures are a good idea.

Three things to know

1) The eye is drawn to images – research has shown how we linger over pictures on the screen, and go back to them. Even split-seconds make a difference when you’re trying to keep someone’s attention. Striking images can help keep people for longer on your site.

This heatmap shows where people look longest on a Google search page - at the images

This heatmap shows where people look longest on a Google search page – at the images. From Kissmetrics.

Heatmap showing where people look on a Facebook page. From Kissmetrics.

Heatmap showing where people look on a Facebook page. From Business Insider.

2) Great images get shared on social networks, so bringing your photos (and your blog) to the attention of people outside your own social circle.

3) Tag your images and it’s more likely they’ll be found in searches –  it’s another way of people finding your blog, bringing you greater visibility.

Editing images

Size – even if you take photos on your phone they may be enormous – great for printing out but you don’t need them to be that size for the web. A lot of big images can slow down the loading rate of the page.

Blogging software gives you the option to re-size images proportionately into small, medium or large versions, but you may want more precision over this. Cropping allows you to focus in on the part of the image that matters. Think also about how the images will look in your chosen template. Full column width images have more impact that smaller images aligned left or right with the text around them. if you are posting images side-by-side, make them the same height, for neatness, or the same width if they are stacked vertically.

Brightness – you may want to lighten up your photos before posting them. A great (free) tool to use is Pixlr Editor  – it’s got all the features you’re likely to want for basic photo manipulation. If you take photos on your phone, check out all the image editing options you have there – you may be surprised!

Things to remember

Don’t just lift pictures from around the web for use on your blog – they may well be copyright. Google Images is a great search engine, but always check before copying anything. Good royalty-free images sources are Flickr (many photographers make their images free to use as long as you give them a credit and a link – but do check with the individuals first) and museum and art gallery websites (look for their ‘free image library’ or similar). Sites like iStockphoto and Dreamstime offer a large range of royalty-free images for a small fee.

Tag your images with key words, and give them an ‘alt’ text as well – which gets seen even if the images aren’t showing. Include a keyword or two (the words you want to be found for) in the alt text and any caption, if possible.

Add ‘share’ buttons to your blog, to encourage people to share your posts and your images. If you use Buffer, for example, you can add a ‘share’ button with the update text already pre-populated (this is where you would add your blog URL).

The Buffer share button

The Buffer Button – configure your share button to make it easy for people to share on their social networks.

Creating a share button on Buffer | Social media for writers by Robin Houghton

When people click on your Buffer share button they can share your content to their social networks with one click.

Take a look at Pinterest, if you haven’t already. Create boards around specific topics and pin your blog images there. Give each image a description – use keywords again – you have up to 500 characters so make the most of it, as it will help people find your images. Include your blog URL so that the images lead to your blog. You might think writers are not interested in visuals, try searching for ‘writing’ and other writing-related topics on Pinterest, and you’ll find there’s plenty going on. Even if you don’t use Pinterest yourself, add a ‘Pin It’ social button to your blog, to encourage others to share your images on Pinterest.

There are plenty of boards on writers and writing at Pinterest.

There are plenty of boards on writers and writing at Pinterest.